It's been over a week, and this blog post is late due to me passing out from working at ID Tech almost every night. However whenever I came home I tried to get a little bit done on this piece. With my job taking up most of my time, I feel like I've been glancing over some important details.
I began gathering reference images related to some more neon areas. I prefer the scene to be moody and let a lot of the lights of the emissive neons do their work, Since the scene is an interior, I didn't gather many references for the exterior, but still went through the process of grabbing a few glances from the outside.
After looking over the images, I think the two images on the top are more representative of what I want to see in the environment from the exterior. Since however I enjoy the large windows in the bottom right image, I think I'm going to use to bring some natural light into the scene, where before the very little natural light i had was purely through the blind shudders of the Arcade before. Alongside the lighting from the machines, I've assembled a small moodboard of interiors to see the different forms of unnatural light and layouts of the machine.
Some of the things that stuck out to me are the carpets, ceiling tiles, and the ventilation in the images above. I like the dark blue of the carpets as it matches my old one and gives me an idea of how the floor lighting can be dimmed along, given the patch of light in the upper right image showcasing how the carpet doesn't seem to catch all that much light. The machines and cabinets are very similar to each other, so for now I think i'll be focusing on the simple machines and making a more small corner to the arcade. This time instead of going for quantity, I should be focusing on quality. I'll be limiting myself to four machines, my skeeball machine, which needs only a retexture, My Arcade cabinets, and the coin machine.
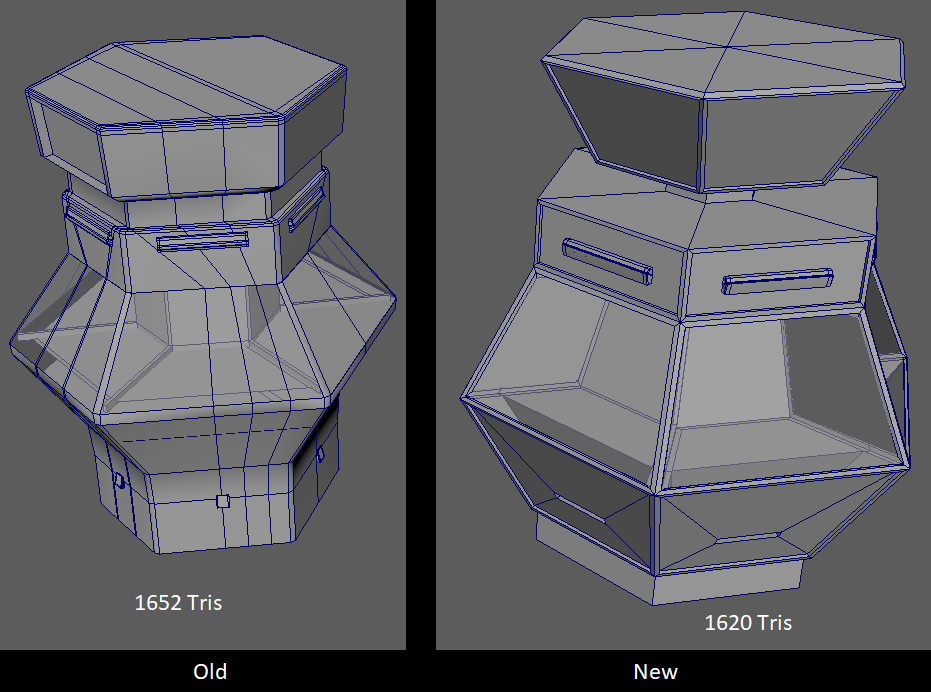
The Coin machine model I believe was one of the weakest parts of the previous scene, so I made a more divisive moodboard for it.
The Coin Machine is one of the machines that I'm most interested in remodeling due to it's complex shape and the fact that I'm a much better modeler than I was back when I first started this project. So with all my reference images in hand, it's time to get back to work. I decided to first focus on multiple machines, redoing their models since they had high polycounts before and since I've gotten a lot better at modeling, wanted to fix a lot of the wacky topology that occupied them. Below I have the side by sides of the more complex models, or ones that saw a drastic decrease in Polys compared to the old ones. The Coin Machine pictured below was the most different compared to before, as I was much less careless with Edge Loops and have a better understanding of snapping and vertices.
The process of making the Coin Machine was using the 6 sided Cylinder, and then snapping objects by 60 degrees when rotating in Maya, along with using Component for extrusions to make sure all the sides were evenly spaced. I would use snapping UV stacking to make sure my shells were all even, so I could keep up with the symmetry of the product and not have different edge flows on multiple sides. I also chose to not bevel as much, since the natural shape of the object carried through, and spent the poly budget on making the metal railing cases.
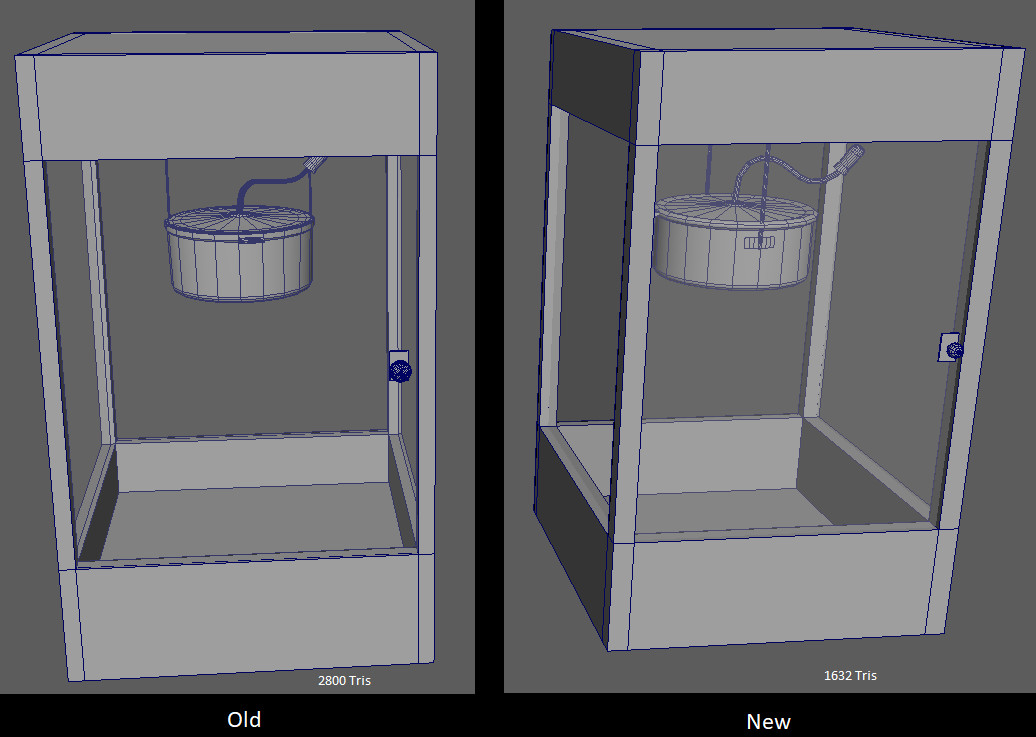
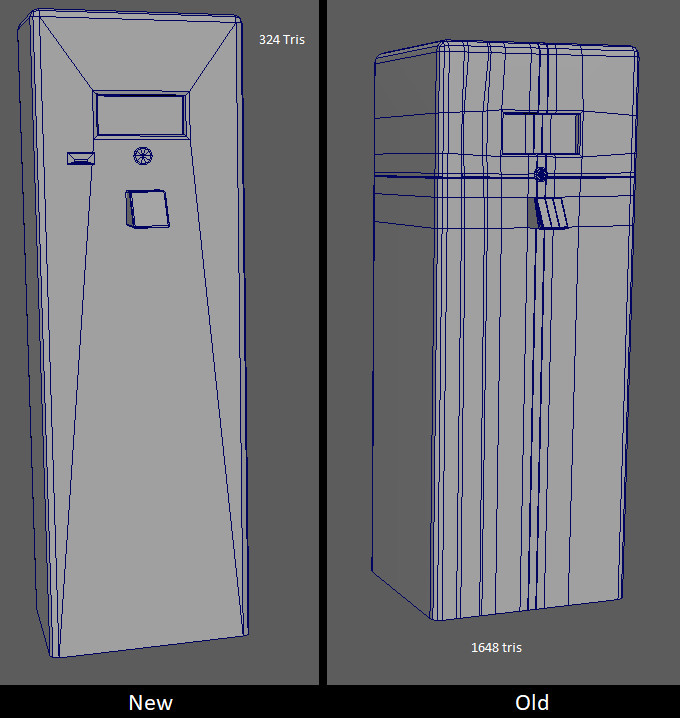
Below are some other models that had too many polygons prior.

Reducing the polycount of the Arcade Machine was incredibly important since in my previous scene they were repeated 18 times. It was a lot of unneeded polygons, given that I shaved over 2k off each one, saving almost 40k polys.
The ticket Machine also now Isnt all one object, making it much less ugly.
While not entirely visible, the changes to the Popcorn Machine are on the pot, getting rid of unneeded bevels to reduce the polycount by 1000.
After that, I made several other assets that I felt were required for the scene, redoing small ones. Below is the initial pass at the modular kit, with more models to be added as I deem them necessary.

After a while I created this kit of assets. More are likely to be added after the initial scene setup, but I wanted to figure out the arcade machines before going to the ceiling, which is where a lot of time will be spent lighting. I really like the exposed ventilation in one of my reference images, and think it would be fun to play around with some of the funky lights that could spruce up the scene with neon colors. I think lights that are most subject to change are my round lights, which I've swapped my ceiling for for simplicity sake. Yay for iteration!
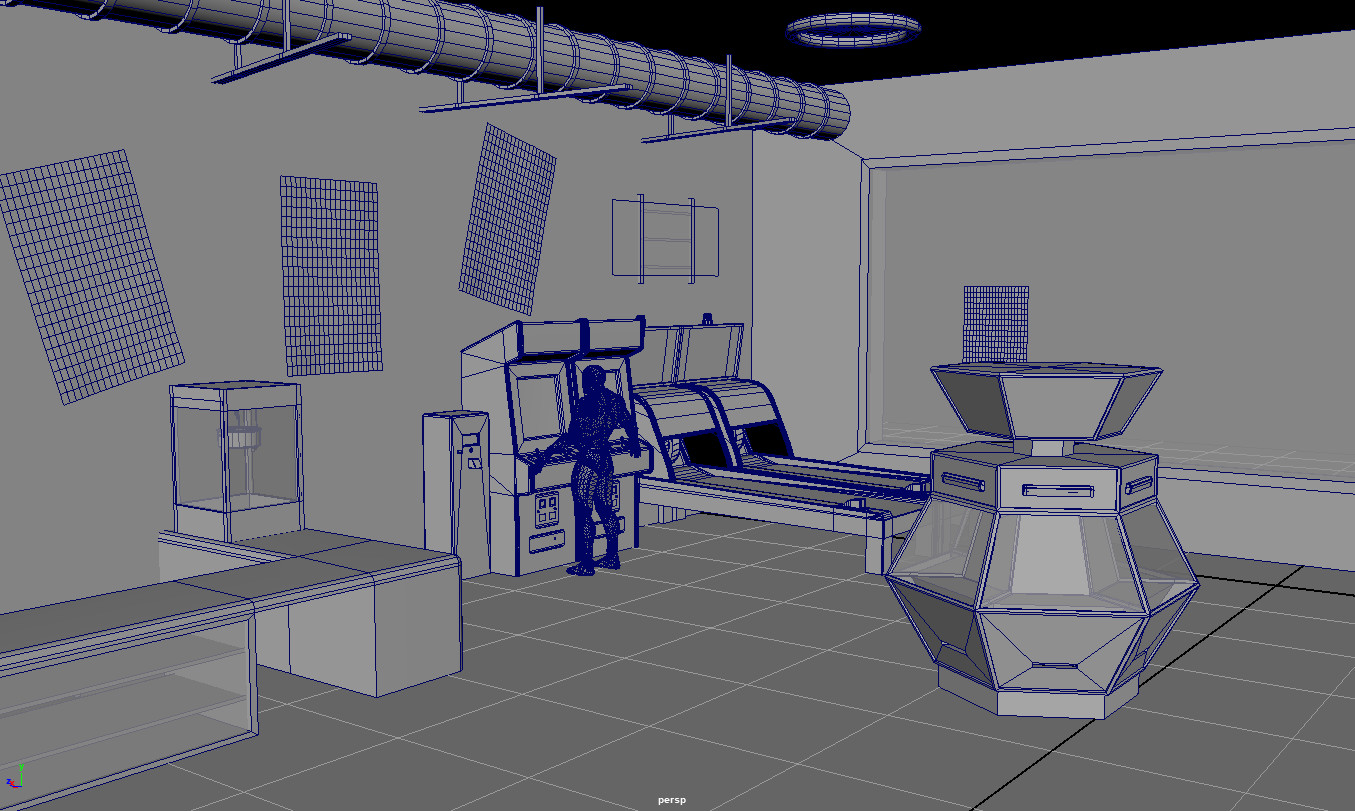
I then blocked the scene out in Maya to get a grasp of what I want it to look like.
I took the Unreal Engine man out because I could use him for scale, and plopped him in the scene. An observation I made is the ceiling might be way too high for what I'm going for, and the posters dont seem to scale. I decided to adjust a bit before deciding to import some assets into Unreal and try to do a base lighting test before going further, to see if that affects the spaciousness of the room.

I focused mainly on the directional and skylight of the room, with a point light where the neon sign was. Without materials, it's hard for me to get an accurate reading, but figured it was a good start since it let me check for lightmapping errors, and get the window shadow to cast as I wanted it too. In addition, I moved the ceiling down slightly and scaled a few posters differently so they didnt seem out of place. The overall composition might need some work, so that's my next focus is assembling everything properly.
I'm moving to some texturing next week, so I'll have some more updates by then! I think this blog is helping me spot some mistakes and shortcomings I made, and it's good to let me see the progress tracking. Any feedback is welcome since I'm working on this between my days at ID Tech!
Charlie